

things I learned while learning to cook + gyoza-inspired cabbage rolls in a gochujang sauce
Happy Sunday and welcome back to dinner, sorted. Let’s get your dinner, sorted!
This week, I want to share some key lessons I’ve learned from teaching myself how to cook and develop recipes. If you didn’t already know, I’m completely self-taught. I learned by watching YouTube (shoutout to Epicurious and Bon Appétit), reading cookbooks like Salt, Fat, Acid, Heat and How to Cook Everything, obsessively researching techniques and the science behind cooking, and—most importantly—getting in the kitchen, experimenting, and failing (a lot). That last part? Probably the most important.
Some game-changing things I learned early on:
1. Salt is everything.
Salt should be added in layers. When done right, it won’t make your food salty—it actually enhances the flavor of each ingredient. A little bit at each stage of cooking makes all the difference and will completely change your cooking. Not all salt is the same! I write my recipes with Diamond Crystal Kosher Salt, which has larger flakes than table salt, meaning 1 tsp of table salt is wayyy saltier than 1 tsp of kosher salt. A single box lasts me 2–3 months, and I use it a lot.
2. Not all recipes are created equal.
If a recipe doesn’t turn out, it’s not always (actually usually not) your fault. Ingredients, kitchens, and cook times all vary. And honestly? Some recipes are just written bad. Many of them assume you’ll “fill in the blanks” on certain steps which if you’re new at cooking doesn’t always work out. But at the very least you can…
3. Always read the recipe before you start.
This avoids surprises like realizing halfway through that you need a diced onion immediately. Plus, it helps make sure you have all the tools you need.
4. Tools.
If a recipe calls for a certain tool, like a non-stick pan, there’s usually a reason for it. A chicken breast seasoned the same, with the same oil, at the same heat, will yield a different result on a non-stick vs a cast iron vs a stainless steel. Use what you’re comfortable with, but don’t be afraid of stainless steel—it’ll give you a better sear. If you’ve had bad experiences with food sticking, chances are your pan wasn’t hot enough or you didn’t use enough oil. A good stainless steel pan + proper heat = game changer. So start with an inexpensive one (like my Cuisinart) and give it a try. And if something does stick? Hot soapy water + steel wool = good as new. Unlike nonstick, which is basically ruined if you burn stuff onto it.
5. Mise en place = your best friend.
Yes, it takes extra time upfront, but prepping everything—chopping, measuring, opening cans—makes cooking so much smoother. Some recipes walk you through this, but many will hit you with “add 1 diced bell pepper” when you’re up to your elbows in raw meat and your pepper sits idly by, unchopped and unready for you. Buy some cute little bowls, set up your ingredients beforehand, and suddenly you’ll feel like a pro.
6. Cook times are just guidelines.
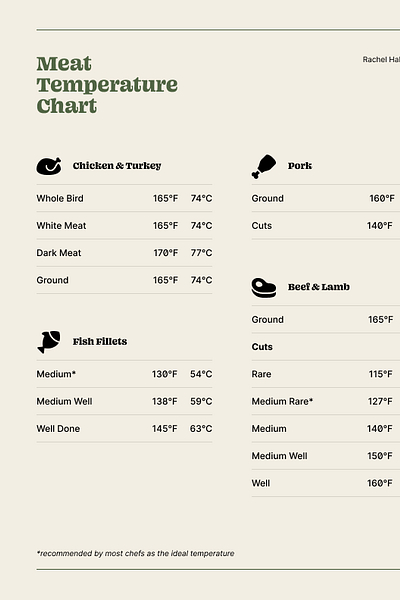
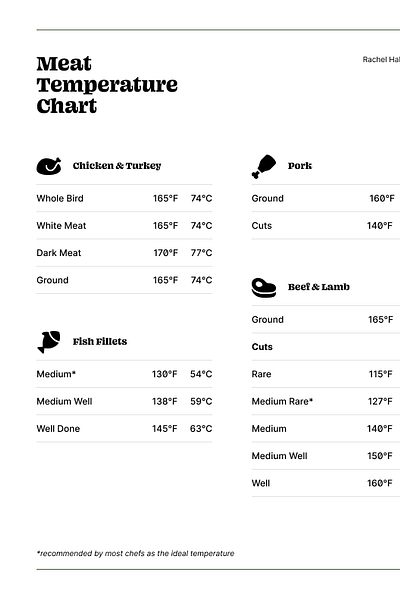
If a recipe states “cook the chicken for 5 minutes per side,” don’t take that as gospel. Ovens, pans, and cuts of meat all vary. This is why I never cook meat without a thermometer. No more slicing into chicken to check if it’s done (and losing all the juices), and no more dry, overcooked meat because you got nervous. Meat is just better when it’s cooked properly. I’ve even made a printable meat temperature chart below so you can keep it on your fridge! And if you haven’t by now, get a thermometer!!
7. Measurements matter.
“1 cup nuts, chopped” is not the same as “1 cup chopped nuts.” The first means measure whole nuts, then chop them. The second means you’re measuring the chopped pieces. That little comma changes everything, and it applies to most ingredients. Also, a dry measuring cup does not equal a wet measuring. I was recently making pancakes and dumped my dry 1 cup into my wet measuring cup and it was way off. Going back to my “tools” rant, make sure you’re using appropriate tools for measuring as well.
8. Use the best ingredients you can.
This is here last for a reason. While it will make a difference, I know this isn’t accessible to everyone at every time. This doesn’t mean you have to “buy organic” or get the most expensive ingredients. But when possible, go for seasonal produce, better-quality meat, and fresh spices (yes, your 5-year-old garlic powder probably needs replacing). That said, work with what you’ve got! A well-seasoned dish made with average ingredients will still taste amazing.
Well thanks for listening to me ramble, I hope this helped even just a bit.
🎉 Before we get to the this week’s recipe - a giveaway is due! Thanks so much for dropping feedback about the meal plans last week. The winner for 3 months free is… Adrienne M! 🎉
And don’t worry if you didn’t win this round, there will be plenty more coming your way soon ❤️
this week’s dinner, sorted: gyoza inspired cabbage rolls in gochujang sauce
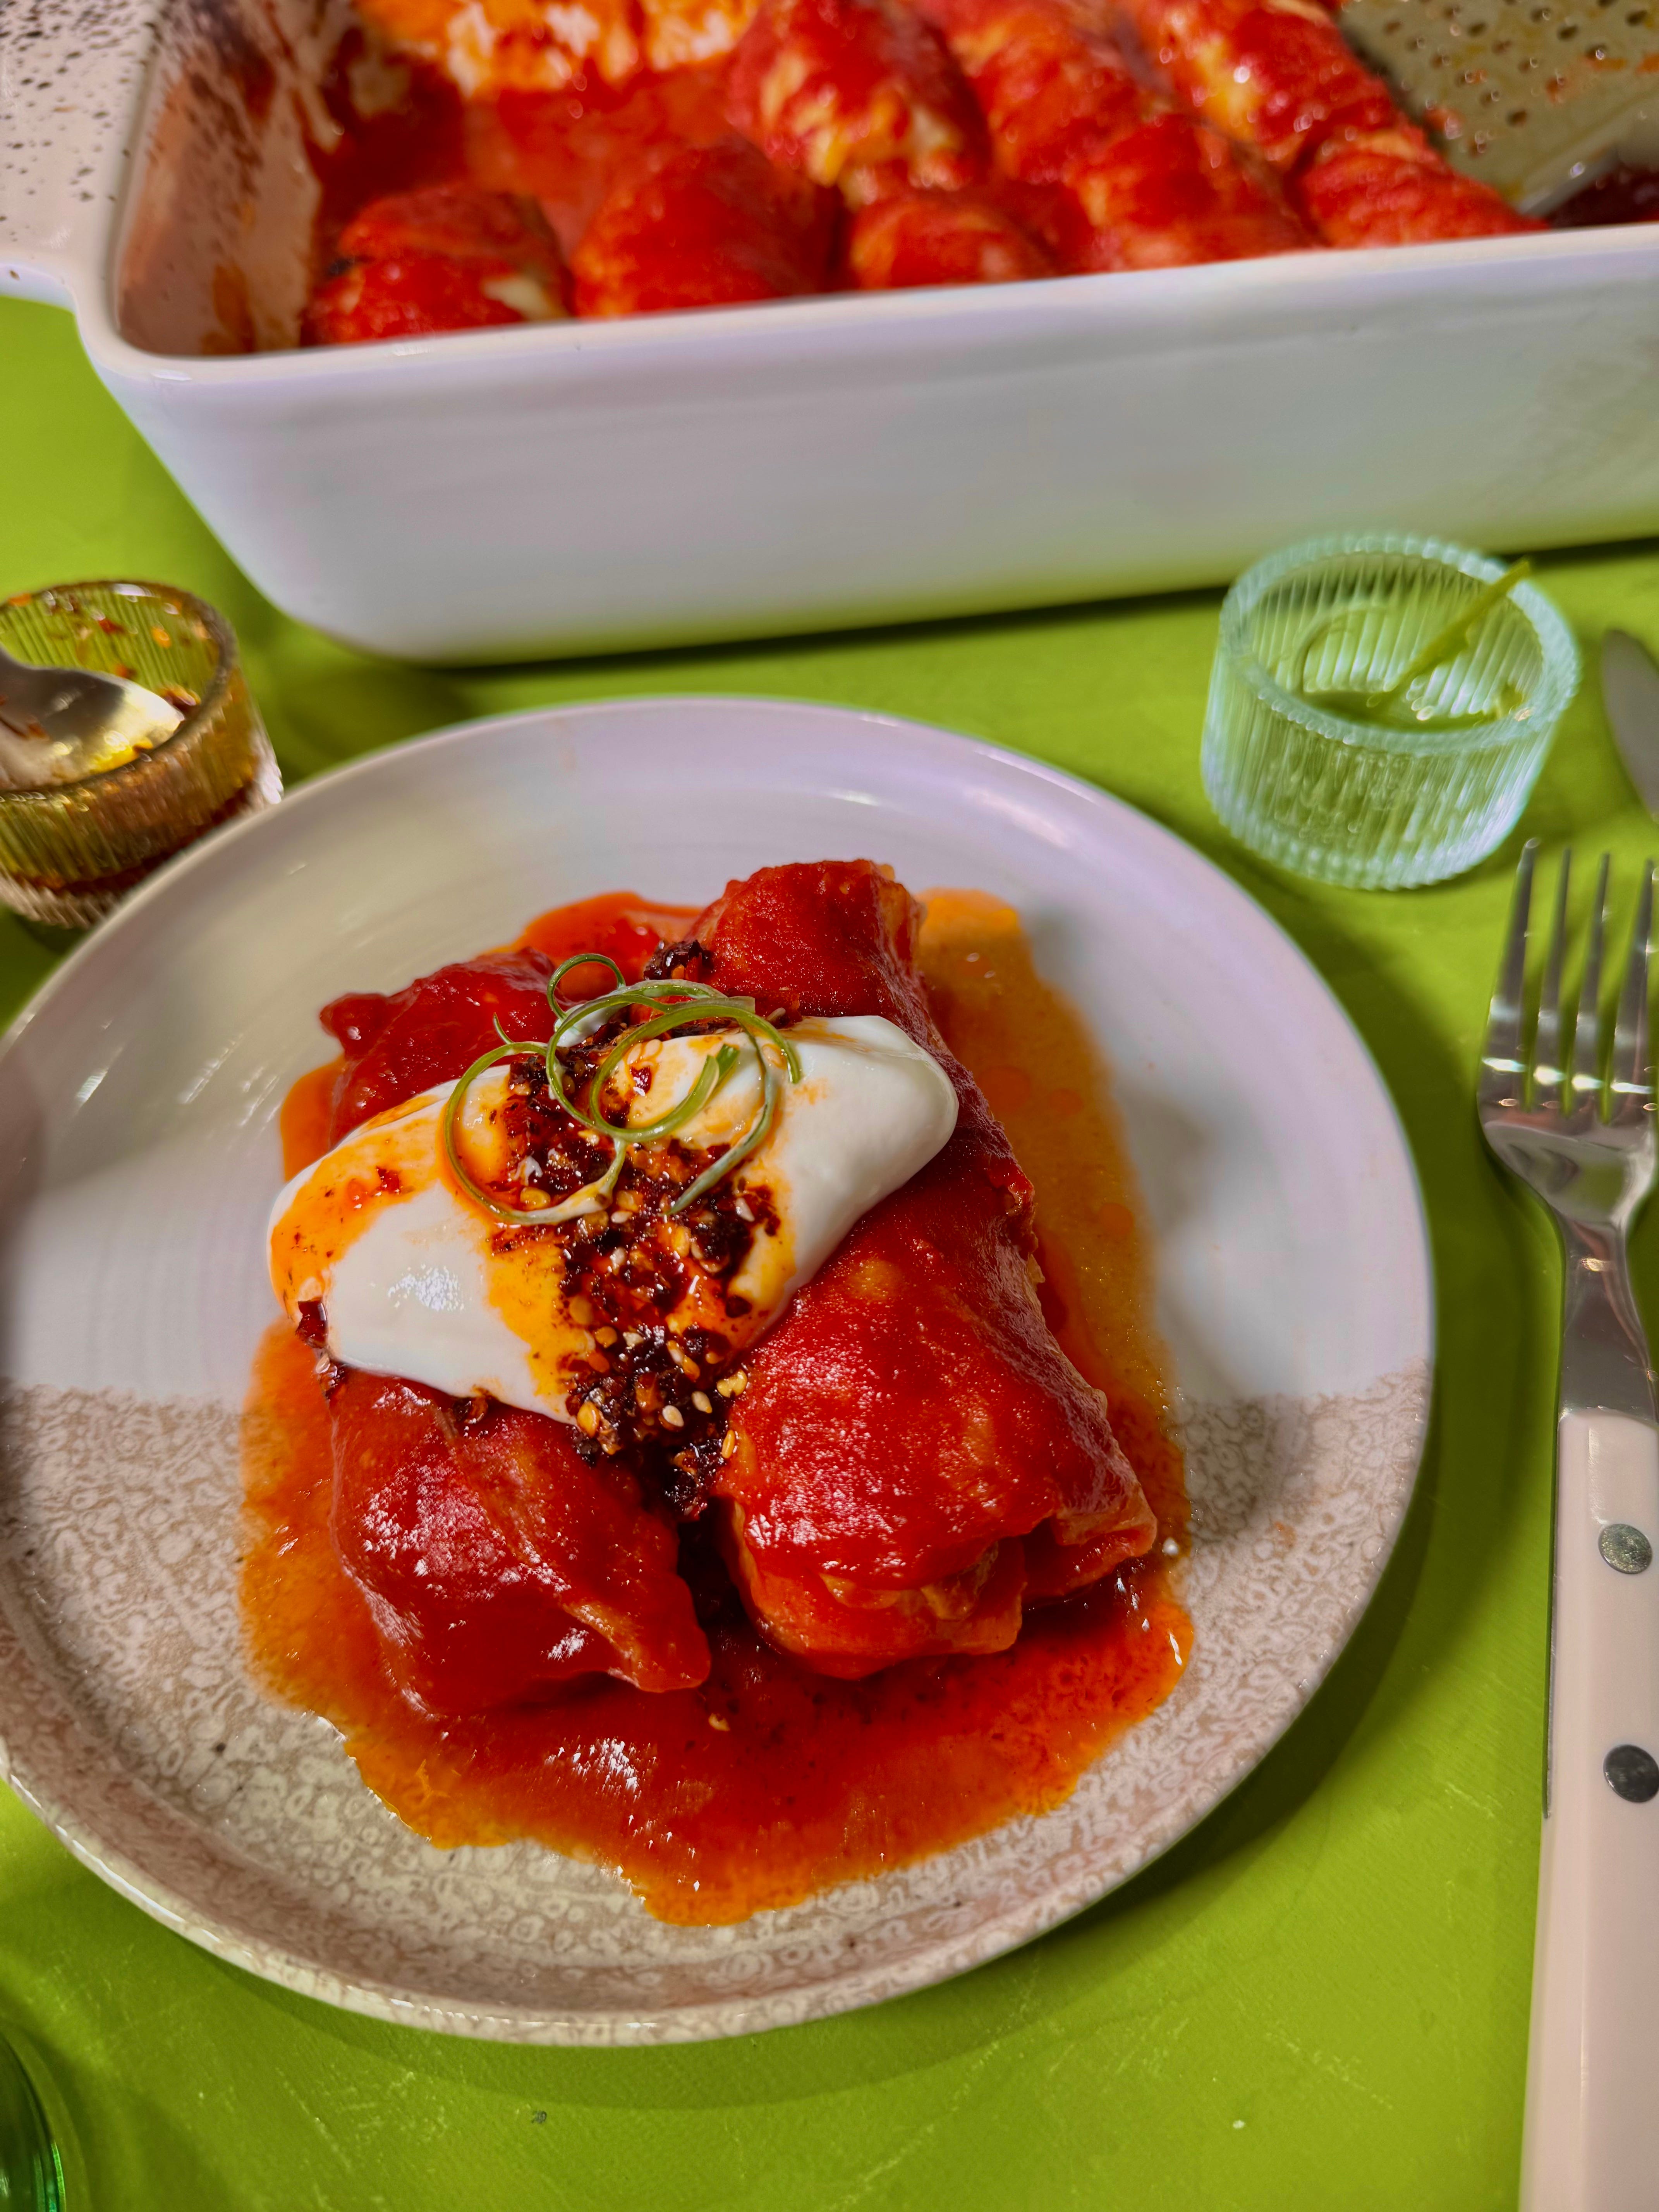
Cabbage rolls have been filling my feed, and so has that viral hack where you freeze the whole head instead of boiling the leaves. So naturally I’ve been lured into craving them. But as I do, I wanted to put my own spin on things. Since pork and cabbage are the stars here, I leaned into my favorite - gyoza-inspired flavors, for the filling.
I initially paired them with a simple tomato sauce, but it wasn’t doing much for the filling—so I reworked it. Enter gochujang and miso, which took this to a whole nother level. And I know it might sound a little unexpected, but the chili crisp and sour cream topping just works. The sour cream adds a fresh pop against the rich, cozy rolls, while the chili crisp adds a pop of texture, and rounds the flavors back perfectly to the filling.
Below I share the “viral freezing hack” but also share a few other ways you can prep your cabbage if your freezer is bursting at the seams like mine.